Thursday, June 30, 2011

New Window Treatments AT LAST

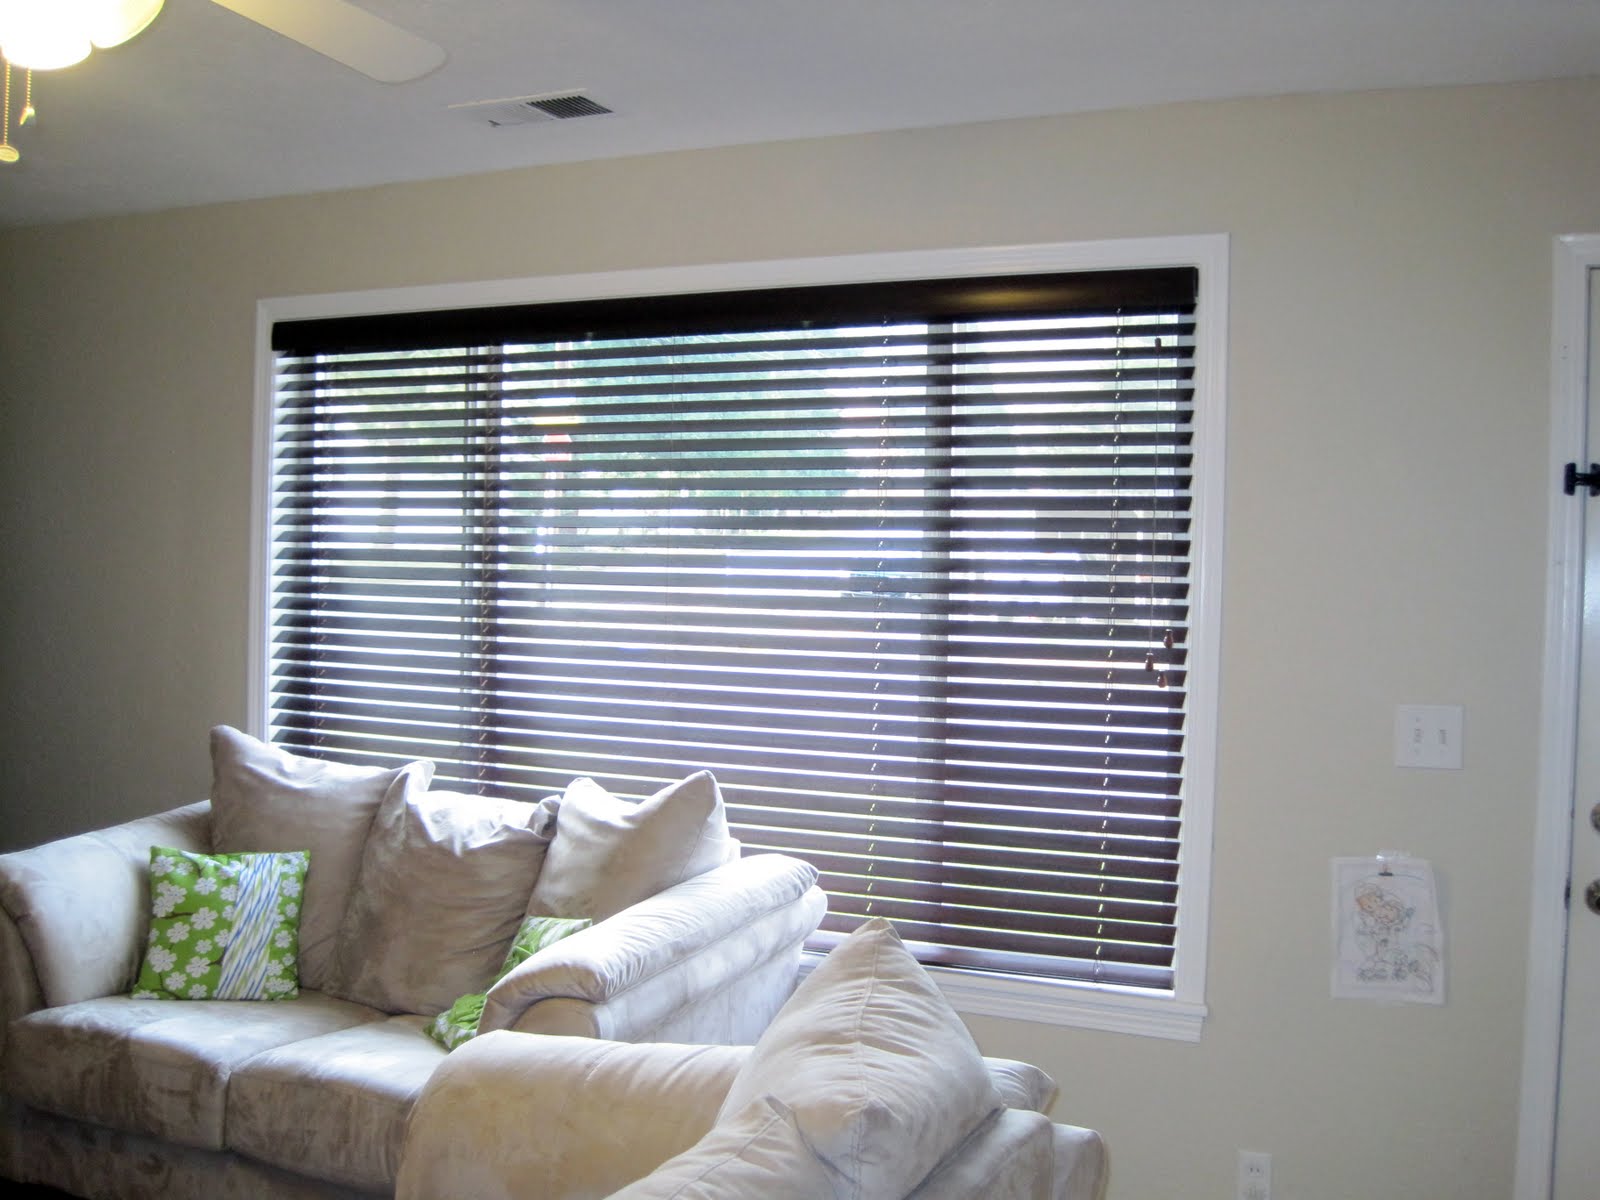
Unfortunately, this is really the only true BEFORE I have of the original, dirty, broken blinds that were in the master suite. 
Lovely, right? 

A little over a year ago, I got this great idea to make faux roman shades based on this tutorial at the Little Green Notebook (aka Pearl Street Interiors) and bought this material: 
and then I let that sit around for another year... 

In the meantime, this past February, we decided to finally replace the gross blinds we'd been living with and bought some inexpensive light-filtering mini blinds from Home Depot.  Quick and easy to install, and SO much better looking than what we'd been living with, we couldn't figure out why we hadn't done it a year earlier. 
At that same time, my dad came down to visit and help with a few projects -- biggest of all being the painting of our bedroom.  Valspar Premium in Pale Cowslip 1. I love it. LOVE it. My husband is okay with it. The color makes me feel happy and sunny and warm, although you can't really see the color whatsoever in that last picture... 

Anyway, jumping ahead to the month of June -- I finally found made the time to complete the actual window treatment I'd been intending to make all along.  I like my room to be VERY dark when I sleep, so I knew I wanted to incorporate a lining into the shades (which was not included in the tutorial, so I hemmed and hawed over how to do it.  In the end, I created a sort of slip cover and actually left all the mini blind veins intact.  I used a button hole for the cord to come through and did all the sewing on my machine except for the closure at the bottom, which I sewed by hand.  
(you can see the new paint MUCH better in these pictures: L-O-V-E, right?)
And for anyone wondering, they do open higher than I show in the picture.  I just didn't. 

All in all, I'm pretty happy with how it turned out. There are a few things I could  have taken a little more time on and done a little better... maybe if I wasn't 9 months pregnant I would have. Haha

Friday, May 13, 2011

To Prune or Not to Prune

I'm pretty sure my husband would preferred had I NOT pruned the Japanese maples out front, but the combination of overgrown shrubbery and pregnancy hormones were more than I could resist. It took a few weeks, three passes at it -- each more aggressive than the last, but they're finally a reasonable height. Come this next dormant season, and I'll be hacking away at them again... 

The initial "before"
 artistic "at work" shot taken by my son
 After the initial round of cuts, where I focused mostly on removing dead branches and branches that were rubbing on each other: 
 And here is the pile of debris I began with... 
 Round 2, I spent a little more energy on branches crossing over into other "layers" if that makes sense. It did to me at the time. 
 and my growing pile of debris to be hauled off... 

After a week or so, we made a trip to a nursery nearby to look for some new plants for the backyard. At that time, I took the opportunity to ask for a little pruning advice. Basically, she told me it would have been better had I started a little earlier, but she said to cut away, fertilize, and be prepared for the trees to look "a little funny" for a while. But she said to think of it this way -- there is an entire growing season for the trees to fill back in.  

At this point, my husband may feel I became a little "overzealous." All the clippings in the next picture are only from the third round of pruning... and there probably would have been more had he not come home early. 
and here is the final product of that day's work: 

Pretty, right? But at least you can see the roof again... 

Here it is now after a few weeks of new growth filling in: 
 and now a really dramatic before and after side by side: 

So... the shaping still needs some work (like I said, I'm waiting for the next dormant season) and we need some fresh mulch, but I'm happy with it overall. 

A good article I wish I would have read about pruning Japanese Maples A YEAR AGO: 

Monday, April 18, 2011

Our Window to the World

aka the Living Room Window Finally Got Some New Blinds

I really had to dig to find some "before" pictures of our blinds because I got overly excited when the blinds arrived and didn't bother to take any pictures... so these are the best I could come up with... you can see in the first picture that there's a gap at the bottom because THEY COULD NOT CLOSE COMPLETELY
After Christmas, I started shopping around a little more seriously for new blinds and we ended up with the 2" premium wood blinds in deep mahogany from Blinds Galore, which is the same company I had ordered the blinds from for my son's room

I took the opportunity to repaint the trim around the window... and the more dirty, white trim I paint in this house, the more I realize the white isn't paint. Someone went to the trouble of priming a lot of the woodwork around the house and left it at that. Needless to say, it looks a LOT better now. 
 out with the old, in with the new!
 and the finished product!
 my goofy husband demonstrating the relative ease with which we can now open and completely close our new blinds
 I love them.


Friday, April 15, 2011

Master Bathroom Towels

When we first moved in, the towel rack in the master bath was half falling out of the wall and refused to hold my towel.  After a certain point, it was completely out of the wall and I had long since given up trying to keep my towel there. We had already installed a robe hook on the other side of the shower door which my husband was using for his towel, and we JUST replaced the towel bar. Originally, I was wanting all brushed nickel in our bathroom, but after using the oil rubbed bronze hardware on the cabinets, we decided it might be better just to head that direction completely.  

So here are the new robe hook (the old-new one will go in the hall bathroom eventually), and the new towel bar: 
 and thanks in no small part to a generous birthday gift card to Macy's... we FINALLY have an all new set of luxuriously soft new bath towels.  Trust me, these were a long time coming and worth the wait.  

Tuesday, April 12, 2011

A New Pillow, or Four

The covers we've had on our throw pillows in the living room have been in our house since we were married, almost five years ago.  I thought it was time for a change.  Using the green fabric leftover from this project, along with some other coordinating fabrics I "happened" to pick up, combined with some inspiration photos from online, I have four new pillows on our couches.  Well... they look brand new, at least. I can't ever get myself to buy new pillow forms while I still have perfectly good ones on the couch.  

This first picture is from my sister-in-law's blog 
and here is my version: 
 The last three inspiration pillows are all from Anthropologie


 We like things a little off-center in our house... 
 and a close-up of the cummerbund pleats that took me WAY longer than they should have:

They all have envelope closures so they're 1. easier to clean and 2. easier to replace the covers when I get bored of them.  I think they bring a little color and whimsy to the room, if that's not too cliche to say.  Aren't we all ready for spring to really be here, though? 

Friday, April 8, 2011

A Shower Curtain for My Monkey

About a year ago, I wrote here that I replaced the brown and blue shower curtain in the hall bath (my son's bathroom) with a plain white curtain... with the intention of adding some Curious George type embellishments.  In the middle of February, I FINALLY did it.  Instead of Curious George, though, I used the Monkeys from the shower curtain hooks I got from Target that hadn't been working out.  I also used some green upholstery fabric to trim the edges of the curtain and add a little more color to the room.  

One afternoon, while my son was napping, I laid the curtain out on my living room floor, tossed all 12 monkeys in place and sewed them on (you can see the thread where their arms and legs meet their little bodies)

 And even though I think the brown on the walls is far less bleh with the addition of some color to the room, I think I'm pretty well decided on painting the lower portion Weathered Glass. 

I also need to repaint all the white above the chair rail (we never did that because I wasn't sure exactly what I wanted to do for paint in the room), and change out some of the fixtures, including a new fan. I also want a little more storage and I have a picture to hang, but then we'll finally be done with one of our rooms. I hope. 

Tuesday, April 5, 2011

Just a Hutch

Pretty much from the time we got this house, I have been wanting a buffet with hutch and a sideboard for the dining room.  It turns out, they don't generally appear on your doorstep for free.  Back in November, my husband found this set on craigslist for under $100 and we jumped on it. 


 It pretty much sat in our dining room like this until the middle of February... 
 We took off all the hardware and I primed with 2 coats of kilz oil based primer
 Then painted three thin coats of Olympic Premium no-voc paint in Ultra White
Lastly, I coated the back of the hutch with black contact paper
 I reattached all the original hardware, which I actually think looks updated against the fresh white paint.


Now I just need to figure out what to fill it up with!